When I first started making polymer clay earrings, it was a part-time creative escape in a 30 m² apartment — just me, some clay, and big dreams. One of the first lessons I learned? If your post attachment isn’t solid, the whole earring is a waste. But once I found my go-to method (UV resin sealing), everything clicked.
In this guide, you’ll learn how to attach earring posts to polymer clay earrings step by step — from prepping surfaces to sealing with resin. Whether you’re crafting for fun, friends, or future customers, this post helps you skip the trial-and-error and get it right the first time.
Skill Level: Beginner
Baking Temperature: 110–130°C (230–275°F)
Time Required: 1–2 hours (depending on detail & drying time)
Perfect For: DIY lovers, new jewelry makers, or anyone who wants a chill creative break
So you’ve finished your earrings, and the design is chef’s kiss—but the post pops off.
Annoying? Yes. Avoidable? Absolutely.
Whether you’re gifting handmade pieces or selling them online, one weak post can break trust and your hard work. After testing every method out there, my ride-or-die for securing earring posts is UV resin sealing. It’s fast, clean, and rock solid when done right.
Let’s walk through how to do it properly—and what other options you’ve got if you’re experimenting.
Why Earring Post Attachment Matters
- Your earrings stay wearable, not shelf decorations.
- Buyers or friends trust your craftsmanship.
- Loose posts = wasted time, materials, and confidence.
Even if every other part of the earring is perfect, a bad post attachment can ruin the whole piece. That’s why knowing how to attach earring posts to polymer clay is just as important as the design itself.
I still remember the first time someone messaged me to say their earring post came off after just one wear. I felt awful. That moment pushed me to figure out not just what looked good, but what lasted. It’s why I test every batch now—tug, twist, wear-test—before I ever send them out. If you’re selling your pieces, this step isn’t just about durability—it’s about building trust. One solid attachment speaks louder than a hundred perfect photos.
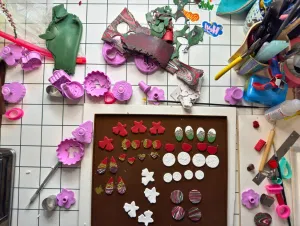
4 Proven Ways to Attach Earring Posts to Polymer Clay
There are a few methods out there—but after years of trial and error, these are the top four I recommend (and what I’ve learned about each one).
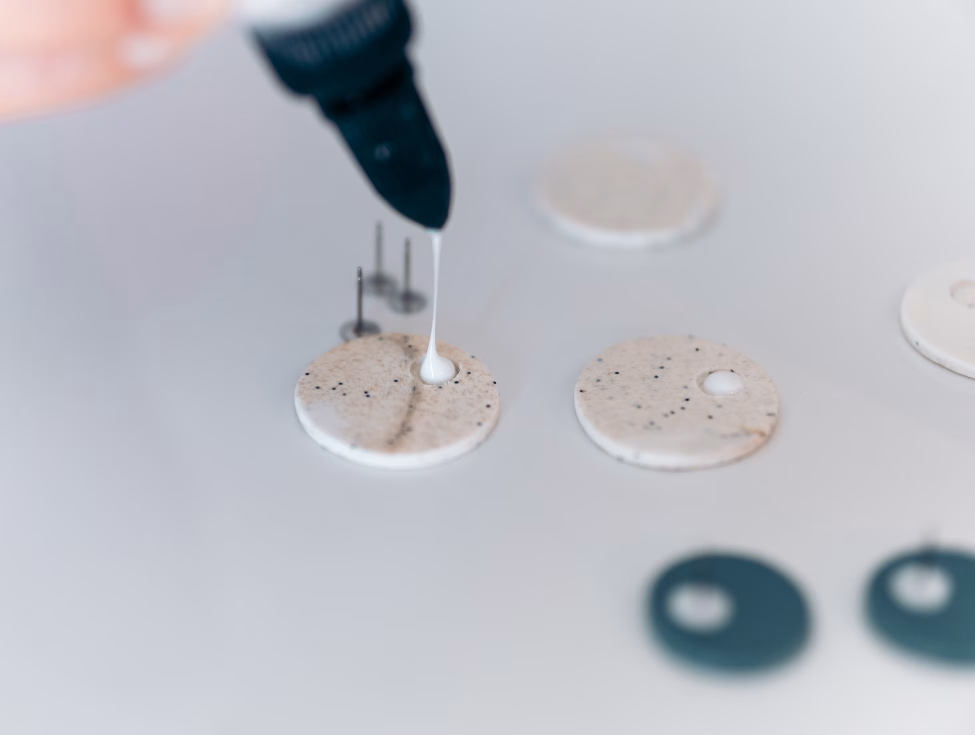
1. UV Resin Seal (My Go-To Method)
This is my go-to: shiny, clean, and strong—no glue blobs.
Steps:
- Lightly scratch both the clay back surface and the metal pad of the post (for better grip).
- Clean both with 99% isopropyl alcohol (removes oils/fingerprints).
- (Optional) put a tiny drop of strong glue to hold the post in place.
- Brush a thin layer of UV resin over the post pad and surrounding clay.
- Cure under a UV lamp (usually 60‑120 seconds, depending on resin).
Pros:
- Glossy, seamless finish
- Fast curing
- No need for a second bake
Cons:
- Requires UV resin + lamp
- Too thick layers might not cure fully — always build in thin coats
Pro Tip: Use a fine brush and mask off the edges so resin stays only where you want it.
2. Two-Part Epoxy Glue (Old Reliable)
When UV resin isn’t ideal (for heavier pieces), epoxy glue is solid.
Steps:
- Sand the post pad gently for texture.
- Mix equal parts of epoxy adhesive.
- Apply a small amount to the pad.
- Press onto the baked clay backing.
- Let it cure fully (typically 24 hours or more).
Pros:
- Very strong mechanical bond
- Good for heavier or large earrings
Cons:
- Doesn’t look as seamless unless cleaned up or sealed
- Longer curing time
- Messier if overapplied
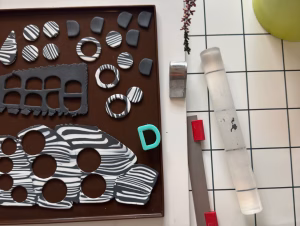
3. Embedding Posts Before Baking
If you plan ahead, embedding can be one of the cleanest methods.
Steps:
- Press the post lightly into raw clay to leave a mark.
- Remove it and put a dab of liquid clay or raw clay into the depression.
- Place the post back in.
- Cover the pad with a thin sheet of clay to “sandwich” it.
- Bake everything together.
Pros:
- Very strong bond
- No glue needed
Cons:
May add thickness or bulk at the back
Must plan before baking
Cannot reposition afterward
4. Liquid Polymer Clay + Glue (Strong, But Extra Steps)
A combo approach that can work with care.
Steps:
- Scratch both surfaces (clay + metal).
- Apply glue and wait 10–15 minutes for grab.
- Brush a thin coat of liquid polymer clay over the pad.
- Bake again (usually 110–130 °C for about 30 minutes).
Pros:
- Creates an interlocking bond
- Back remains smooth when done right
Cons:
Not as strong as full epoxy or embed methods
Requires a second bake
If overbaked or underbaked, bond may fail
Common Mistakes That Ruin Post Attachments
- Not prepping surfaces – skipping scratch/clean = weak bond
- Too much adhesive – “more” often weakens grip
- Skipping a sealing step – UV resin or clay seal adds durability
- Curing UV resin too thick – outer layer cures while inner stays tacky
- Using wrong glue – some are brittle or heat-sensitive
- Post not held firmly while curing – any shift will weaken bond
A Little Mindful Moment
Here’s something no one really says about sanding — it’s actually a kind of therapy.
It’s just you, the clay, and the quiet. The steady rhythm of your hands, the soft sound of sandpaper against smooth clay… it pulls you out of your head a bit.
You start thinking less about “getting it perfect” and more about how it feels to make something with care. That’s what handmade is all about — not rushing, not copying, just creating something real at your own pace.
FAQ: Based on Real Search Queries
Q: How to attach earring post to polymer clay?
A: Use a thin coat of UV resin over the post base after prepping surfaces. Cure thoroughly for strong hold.
Q: What glue works best for polymer clay earrings?
A: Two-part epoxy is strong but slower; UV resin gives a clean, fast cure. Avoid superglue that becomes rigid.
Q:Can I rebake after glue?
A: Generally not—many adhesives don’t stand repeated heating. That’s why the embed or liquid-clay methods come first.
Q: Does embedding the post beat using glue?
A: Embedding provides mechanical hold from within. When done correctly, it often outlasts adhesive-only methods.
Related Posts You’ll Love
- Mixing Resin with Polymer Clay: How to Get That Glossy Look
- The Best Glue for Polymer Clay Jewelry (Ranked)
- How to Avoid Bubbles in UV Resin (For Real)
Ready to Fall in Love with Your Next Favorite Pair?
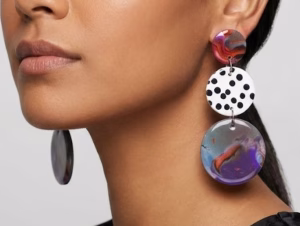
You came for clay tips — but your next earring crush might already be waiting. Bold colors, glossy finishes, statements that break the mold. Nothing basic here.
Scroll our shop, grab your berry, and let the bloom happen.
Final Thoughts: Functional = Beautiful
At the end of the day, attaching earring posts is one of those behind-the-scenes steps that makes the magic happen. It’s not flashy, but it’s what turns your designs into real, wearable jewelry. Don’t rush it. Once you master this part, everything else flows smoother—and you’ll feel so much more confident sending your pieces out into the world, knowing they’re strong enough to be loved and worn.
So grab your lamp, your posts, and that tiny bottle of liquid glass—and secure your earrings like the badass crafter you are.