When I first switched from totally matte clay to a glossy resin finish, things got messy — I trapped a dust speck under a dome and had to sand the entire thing off. But after dozens of trials, I landed a method I trust. This post shows you how to mix clay with resin step by step: prepping, applying, finishing, and avoiding the mistakes I made. If you want earrings with serious shine (but without the stress), you’re in the right place.
- Skill Level: Beginner → Intermediate
- Bake Temp: 110–130 °C (230–275 °F)
- Time Needed: ~1–2 hours (plus resin cure)
- Perfect For: Anyone craving jewelry with that glassy finish
Mixing clay with resin isn’t just about adding a bit of shine—it changes everything. Suddenly, your earrings have depth, drama, and that glassy, high-end look that makes people do a double take. When I first started experimenting with resin, I thought it would be too messy or complicated. Spoiler: it kind of is… at first. But once you figure out how resin behaves (and what not to do), it becomes one of the most rewarding parts of the process. This post covers what’s worked for me—from glossy top coats to casting details in molds—so you can skip the learning curve and dive right into making earrings that look like they belong in a boutique.
Here’s exactly how I mix resin with clay, what works (and what definitely doesn’t), and what I wish someone had told me when I started combining the two.
1. Attaching Earring Posts with UV Resin
This is the foundation. If your post pops off, nothing else matters.
I use UV resin to secure my posts because it’s fast, smooth, and cures like glass under the lamp.
Quick Steps:
- Sand both the post and clay back
- Clean with alcohol
- Add optional dab of glue
- Let it set
- Brush a thin layer of UV resin over and around the post pad
- Cure under UV light for 60–120 seconds
Why I love it: No blobs, no mess, and super secure.
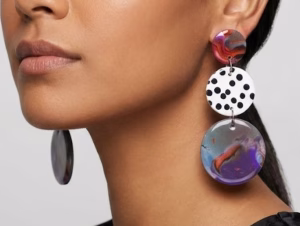
2. Resin Top Coats for That Glassy Look
Want earrings that catch the light like crazy? Top coating with resin gives clay the look of high-end glass.
How to do it right:
- Use a fine brush or toothpick
- Apply in thin layers
- Let resin self-level
- Pop bubbles with a lighter or heat tool
- Cure under UV light or cover and let set (epoxy)
Best for: Marbled patterns, deep colors, or foil flakes.
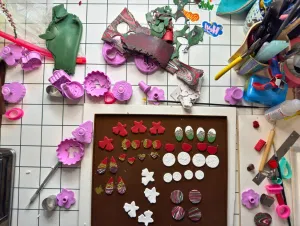
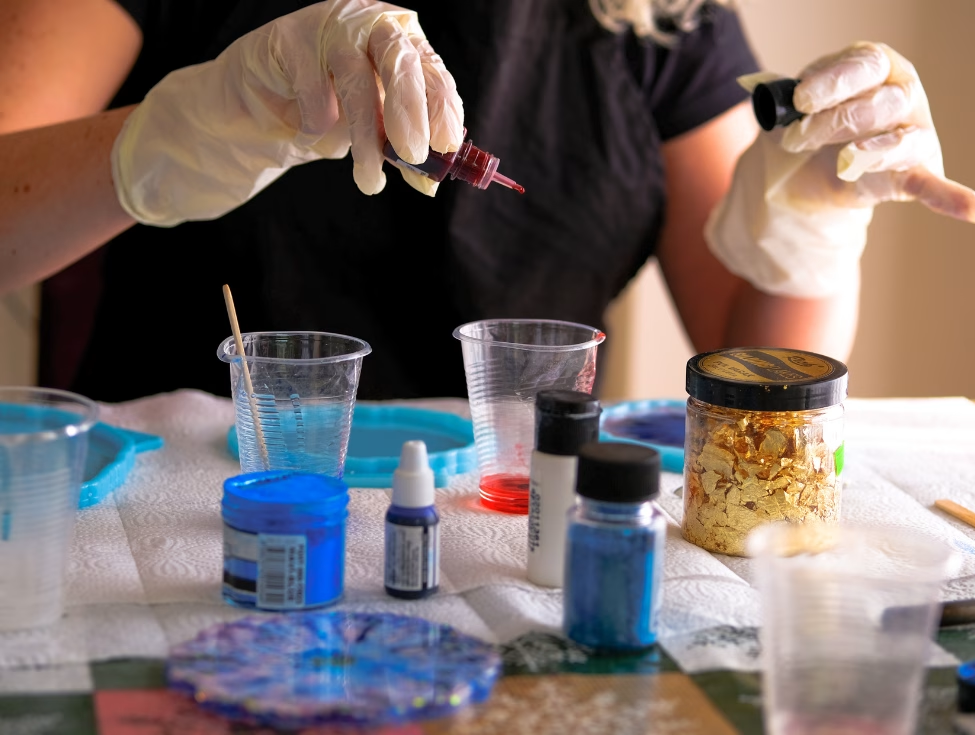
3. Playing with Color: Glitter, Mica, Flowers, and More
Resin is a tiny stage. You can embed almost anything in it.
Ideas to try:
- Glitter + mica for galaxy vibes
- Dried flowers (press flat first!)
- Gold flakes under a thin resin coat
- Tinted resin: Add a drop of alcohol ink or pigment
Just remember — resin exaggerates everything. So specks, bubbles, and fuzz will show too.
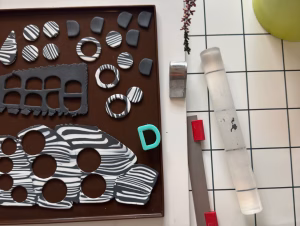
4. Using Molds for Resin Perfection
Silicone molds help you get precise, polished resin shapes — from crisp circles to domed arches.
Pro tip:
You can embed baked clay pieces inside a clear resin shape. It’s like fossilizing your earrings.
Steps:
- Mix resin slowly
- Pour carefully
- Cover to keep dust out
- Cure fully before demolding
Drill your holes after curing, then assemble like usual.
5. Hybrid Designs: Clay + Resin in One Piece
This is where the fun starts.
Design ideas:
- Clay frame + glittery resin fill
- Raised clay texture + brushed-on resin gloss
- Clay base + resin dome
- Resin charm + clay charm combo via jump ring
What works:
The contrast between matte and gloss adds depth and character. It looks like you planned it — even when it started as a happy accident.
Resin Details That Level Up Any Design
Once you get comfortable with basic resin work, it’s worth diving into the little extras—the details that take your earrings from nice to WOW. Think of resin not just as a coat or a mold, but as a design tool on its own.
For example, brushing a tiny bit of UV resin just on the raised textures of a clay piece adds contrast and dimension. It’s like highlighting with lip gloss: subtle, shiny, and super effective. I’ve used this technique with floral designs, abstract textures, and even leaf imprints—and it always looks like more effort than it actually was.
Another favorite? Layered resin pours. Add your base layer with something subtle like a soft glitter or pigment swirl, let it cure, and then float small flowers, foil flakes, or tinted details in the second layer. You’ll get depth, visual interest, and that “how did they do that?” kind of reaction.
You can even try resin in negative space—cut a hollow in your clay piece, pour colored resin into it after baking, and let it cure into a glossy window. These negative-space resin details look amazing when they catch the light.
It’s all about play. The beauty of resin is that it captures tiny ideas—trapped forever in glossy perfection. Once you start thinking of it as a design element (not just a topcoat), your creativity really opens up.
Real-Life Resin Tips You’ll Be Glad You Know
- Wear gloves. Resin is messy and not skin-friendly.
- Mix slowly, then let it rest before pouring — bubbles rise.
- Keep your space clean — resin makes every speck visible.
- UV resin shrinks a little. Epoxy, not so much.
- Don’t go thick with UV resin — it won’t cure properly.
- Epoxy will yellow over time (even “non-yellowing” ones). Use on darker clay or plan to topcoat again.
- Liquid polymer clay ≠ resin — cool, but different. It won’t give the same shine or strength.
Resin vs Epoxy Glue: Best for Earring Posts?
| METHOD | PROS | CONS |
| UV Resin | Fast, glossy precise | Needs UV lamp, can stay tacky if too thick |
| Epoxy Glue | Industrial hold | Messier, longer cure, not as smooth |
| Liquid Clay + Glue | Good fusion | Requires rebake, not as clean |
| Embedding Posts | Strong base | Needs planning, not adjustable |
Final Thoughts: Messy Magic Worth Mastering
Resin isn’t always easy. Sometimes it bubbles. Sometimes it dusts. Sometimes it just doesn’t set right.
But once you nail it, it completely transforms how your pieces look and feel.
Whether you’re coating, casting, or embedding — mixing clay with resin adds dimension and polish you can’t get any other way. So don’t overthink. Try. And sand off the fails.
You’ll find your flow..
And honestly, once you see that first piece come out smooth and glossy—like a tiny glass sculpture—you’ll be hooked. It’s addictive in the best way.
Want More Clay & Resin Tips?
How to Embed Flowers in Resin Without Bubbles
Best Polymer Clay Brands for Jewelry
10 Mistakes to Avoid When Mixing Resin at Home
FAQ: Polymer Clay & Resin
Q: How to make clay earrings glossy?
A: Use a clear resin top coat. Apply it thin, cure properly, and avoid bubbles.
Q: How to make beautiful resin earrings?
A: Layer elements (clay, glitter, florals) into resin molds. Cure fully and finish edges.
Q: What is the best clay for making earrings?
A: Medium-firm polymer clays like Premo or Cernit hold detail and bake without brittleness.
Q: How to add resin to polymer clay earrings?
A: Apply resin after baking. Dome, brush, or embed — just make sure the clay is clean and sanded first.