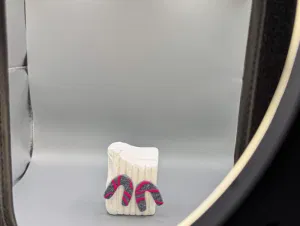
If you’ve ever thought about making your own polymer clay earrings, sanding is the part no one really tells you about — but it’s what makes them look real. The shine, the soft touch, that clean finish that feels like something you’d find in a tiny jewelry shop — it all happens here.
You don’t need fancy tools or art-school skills. Just a few sheets of sandpaper, a bowl of water, and a little bit of patience. Once you get going, it’s actually kind of peaceful — the soft sound of sanding, the water, the feeling of the clay turning smooth between your fingers. It’s slow, but it’s the good kind of slow.
This guide walks you through how to sand polymer clay earrings from start to finish — which grits to use, how to wet sand the right way, and how to polish until your colors pop. You’ll learn the part that turns your earrings from “handmade” to “high-end.”
Skill Level: Beginner
Baking Temperature: 110–130°C (230–275°F)
Time Required: Around 1–2 hours, depending on how detailed you get
Perfect For: Anyone who loves DIY, jewelry, or just wants a creative break that feels calm and satisfying
Alright — sanding. Not the flashiest part of working with polymer clay, I know. But if you want your earrings to look polished, intentional, and a little bit high-end? This is where the magic happens.
After mixing colors and shaping your pieces, sanding and polishing pull everything together. It’s what makes your earrings feel soft to the touch, catches the light just right, and gives your work that “finished” look you see in small-batch jewelry shops.
You’ll get messy, your fingers might wrinkle from all the water, and your patience will probably be tested — but when you hold that perfectly smooth, gleaming pair of earrings in your hand? You’ll know it was worth every minute.
Why Sanding and Polishing Matter
So you’ve baked your earrings. They look cute. But when you run your fingers over them, they feel… just okay?
Yeah — that’s why sanding exists.
This step smooths out fingerprints, mold edges, weird little ridges — all the tiny imperfections that your eyes ignore but your hands instantly notice. It also helps your colors pop and gives your clay that “finished” feel you see in boutique displays.
It’s not just about shine, either. Sanding preps your clay for varnish, resin, or a final buff. It’s what turns “good enough” into wow.
Think of it as skincare for clay. It’s the glow-up phase.
Tools You’ll Need to Sand Polymer Clay Earrings
You really don’t need a full workshop for this. Just a few simple things:
- Wet/dry sandpaper: 400, 600, 800, 1000, and 2000 grit
- A small bowl of clean water
- A soft microfiber or muslin cloth
- Rotary tool or buffing wheel (optional)
- A towel or non-slip mat for drying and handling
Pro tip: cut the sandpaper into tiny squares. It makes it easier to get into corners and curves — and somehow feels more satisfying to use.
Step-by-Step: How to Sand Polymer Clay Earrings
1. Start with the Right Grit
If your piece has visible dents or lines, start with 400 grit. Already smooth? Begin at 600.
You don’t need to press hard — gentle, circular motions do the job. The goal is to even, not to erase.
Noticed your clay bubbling or cracking while baking? Save yourself some sanding stress and read How to Bake Polymer Clay Evenly. Your future self will thank you.
2. Wet Sanding = Less Dust, Smoother Finish
Dry sanding = scratches and dust. Wet sanding = silky perfection.
Dip both your sandpaper and your clay into water before sanding.
It helps with:
- Keeping the surface smooth
- Preventing clay dust buildup
- Protecting your lungs and workspace
If your water starts looking cloudy, swap it out. Cloudy water = scratch city.
3. Work Through the Grits (Don’t Skip Steps)
There’s no fast lane here. Go in order: 400 → 600 → 800 → 1000 → 2000.
Each one builds on the last. Skip one, and you’ll see those micro-scratches under the light later.
By the time you reach 2000 grit, your earrings should feel like pebbles you’d find by a river — smooth, cool, kind of addictive to touch.
Take breaks if you need to. This isn’t factory work. It’s quiet, slow craft.
4. Dry and Double-Check
Lay your earrings on a towel, pat dry, and take a good look under natural light.
If you catch a rough spot, go back a grit or two and smooth it out.
Feel the surface more than you stare at it — your fingers will tell you the truth faster than your eyes.
For a step-by-step look at how to smooth out edges and give your pieces a clean, professional feel, take a look at this guide to sanding and polishing polymer clay earrings.
How to Polish Polymer Clay for That Glossy Finish
Sanding gives you smooth. Polishing gives you soul.
This is the moment they start to glow — when your earrings stop feeling like clay and start feeling like jewelry.
1. Buff by Hand (Great for Subtle Shine)
Grab your cloth and buff in soft circles. You’ll see a satin sheen start to bloom — subtle, elegant, perfectly imperfect.
This is great if you love that matte-but-luxurious look. It still catches the light, just more softly.
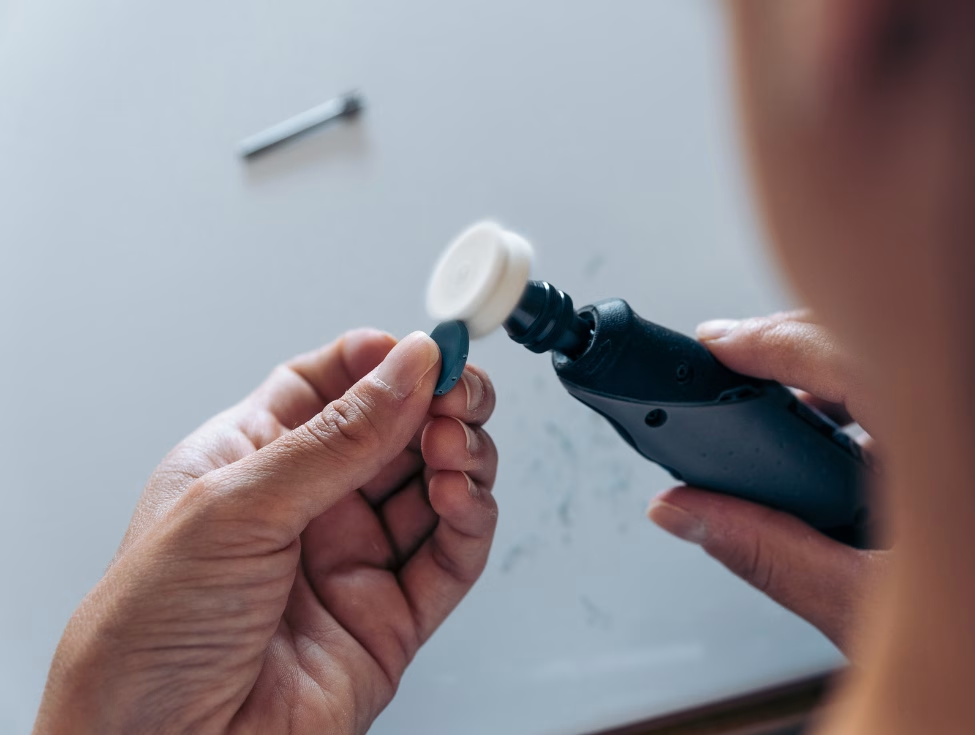
2. Using a Buffing Wheel or Rotary Tool
If you’re doing this a lot, a rotary tool is your best friend. Pop on a soft buffing wheel attachment, set it to low speed, and gently press your earring to the surface.
Keep the pressure light and consistent — too much, and you risk warping your shape.
Safety reminder: wear glasses. The tiniest fiber can hit your eye before you even see it coming.
If you’re curious about using a tool for that glossy, glass-like shine, here’s a simple tutorial on buffing polymer clay with a rotary tool.
3. Optional: Add Varnish or Resin
If you want that “glass table” shine, a thin coat of varnish or UV resin is your go-to.
Just make sure the surface is spotless before applying.
Dust and fingerprints will haunt you later if you rush it.
Apply in light, even coats. Cure completely. Then admire your reflection — literally.
Common Mistakes to Avoid When Sanding & Polishing
- Skipping grits — Don’t jump from 400 to 1000 and expect miracles.
- Dry sanding — Increases dust + scratch risk. Wet sanding is your best friend.
- Rushing — This isn’t the moment to multitask.
- Pushing too hard — Gentle pressure = better control and cleaner finish.
Quick Tips for a Professional Finish
- Skipping grits. It’ll look fine at first… until the light hits it.
- Dry sanding. You’ll scratch your clay, and you’ll breathe in dust.
- Pushing too hard. Let the sandpaper do its thing.
- Rushing. This part is supposed to be slow.
- Ignoring the back. Both sides deserve the same love.
Little Habits That Make a Big Difference
- Sand in daylight — natural light tells no lies.
- Keep your tools clean between grits.
- Always cool your clay before sanding.
- Take breaks. Stretch. Hydrate.
- Enjoy the process — it’s strangely meditative when you let it be.
Why This Step is So Worth It
When you finally hold that finished pair — smooth, glossy, and balanced — it just hits different.
It’s the kind of finish that makes people say, “Wait, you made these?”
And you get to smile and say, “Yeah. Every inch of them.”
That’s the moment you go from crafter to artist.
Want to see how that finish looks in real life? Check out our latest earring collection — all sanded, polished, and made by hand.
FAQ: Your Polymer Clay Sanding Questions Answered
Q: How to smooth polymer clay earrings?
A: Use fine-grit wet/dry sandpaper (start around 400 or 600) and sand under water. Work your way through the grits — slowly. When it feels like polished stone, you’re done.
Q: What grit sandpaper for polymer clay earrings?
A: Start at 400 grit if it’s rough, or 600 if it’s already smooth. Then climb through 800, 1000, and 2000. The higher the grit, the smoother the result.
Q: How to get glossy finish on polymer clay?
A: Buff your earrings by hand or with a rotary tool. For that ultra-glossy look, finish with a thin coat of varnish or UV resin — but only once the surface is spotless.
Q: What is the best tool for sanding polymer clay?
A: Wet/dry sandpaper will always be your go-to. A rotary tool is amazing for polishing if you make larger batches.
Want more gear ideas? Peek at Best Tools for Polymer Clay Beginners.
More Clay Tips You’ll Love:
- From Matte to Glossy: Mixing Clay with Resin for Unique Earrings
- Attaching Earring Posts to Polymer Clay Earrings (That Don’t Fall Off)
- Tips for Mixing Colors in Polymer Clay Jewelry
- Adding Texture to Clay Earrings
Sanding as Part of Your Brand
Here’s the thing: people can feel quality — literally. That soft, smooth texture is part of your signature.
If you sell your work, talk about it.
“Each piece is sanded and polished by hand for that soft, high-end finish.”
It builds trust. It shows care. It proves you’re not just making — you’re crafting.
Final Thoughts
This is the not-so-glam part of making polymer clay earrings… but it’s what takes them from hobby to handmade business.
Put on a good playlist (I’m a ’90s pop girlie all the way), set up your water bowl, and get into it. The transformation is always worth it.
Happy sanding—your earrings are about to shine.